After the file server resource scan service has been successfully installed and started, you can start creating your file server resources as a group policy project, which is only possible once the scan service is running.
You have the option of creating individual shares as projects or a DFS namespace with which you have already combined the shares.
Prerequisite:
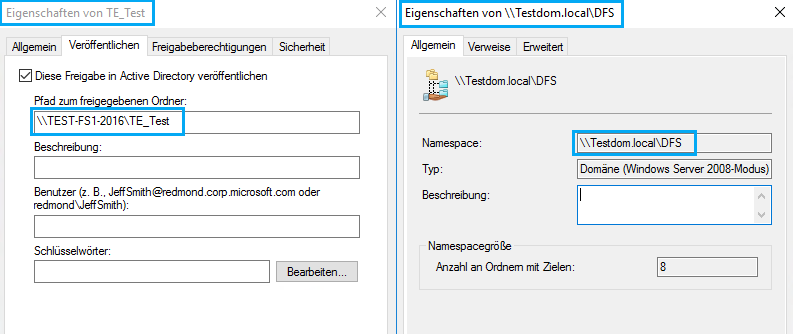
The UNC path you entered under Data as Source Path enter, must Case Sensitive be entered, i.e. in the exact spelling of the share or namespace, as shown in the figure below.
Please make sure that you do not scan resources redundantly. Redundancies in the database always lead to problems.
The Resource Scan Service Account requires sufficient rights to both the share and the NTFS permissions.
Required Windows Service Accounts for migRaven.24/7
Note:
Projects are the basis of the different application scenarios migRavens. With the Group Policy project you cover most migRaven Functions such as data analysis, data retention, access management and task-based migration.
(The migRaven Admin Client also includes the functions of migRaven.one to migrate directory structures and permissions in bulk. This is not part of this documentation!)
After creating a group policy project, the file server resource created is scanned and the existing directory structure is read into the database. The following information is collected:
- Directory structure (Files are not recorded by name in the database. Only the metadata is collected and stored together at directory level.)
- Permissions: ACL of directories
- Meta: age of the files
- Meta: file types
- Meta: file owner
For all meta information, both the number and the storage space used are saved together. No information about files is stored directly!
The later analyzes are always based on the scanned data. The database entries can be updated and brought up to date at any time with a new scan.
Create new project (scan)
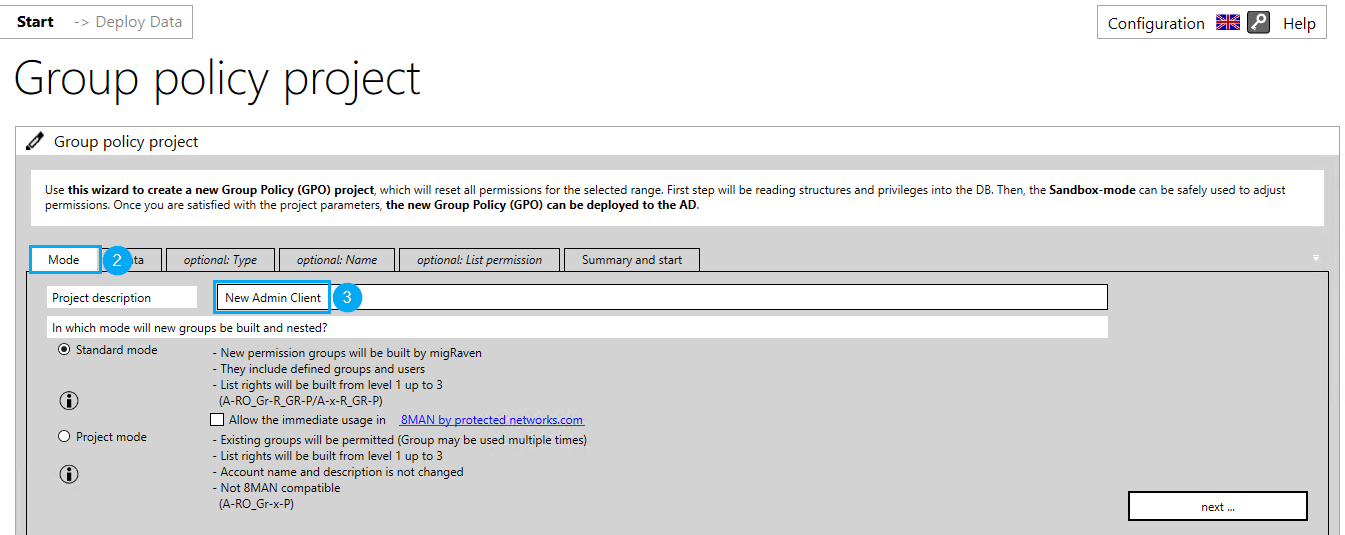
Create a new Group Policy project (1).

Give the project an optional but descriptive name (2) in the Mode tab (3). The name of the project will later be displayed in the Web Client as you select it here.
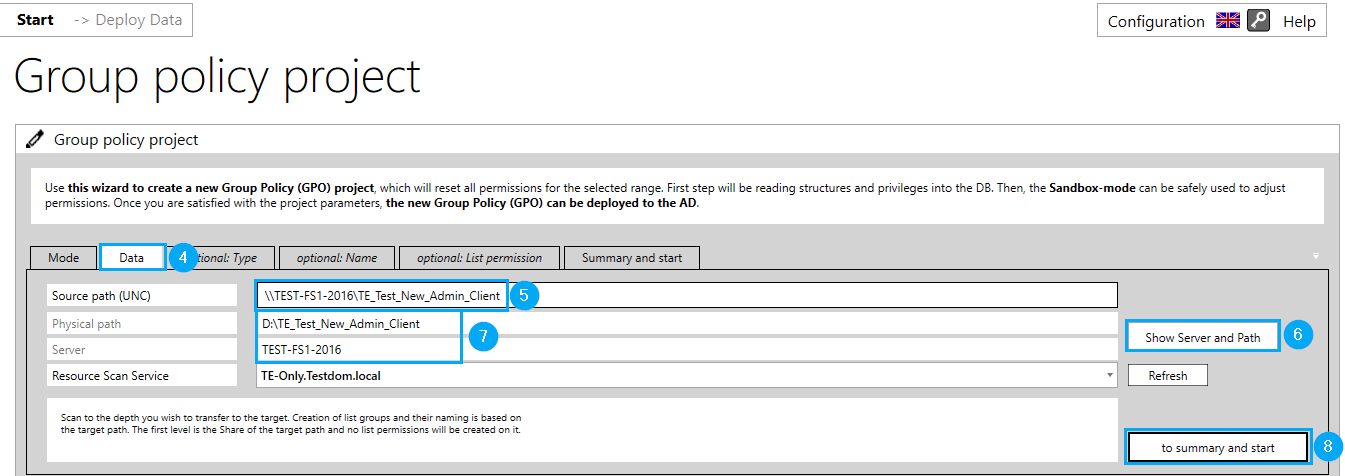
Switch to the Data tab (4) and enter the UNC path of the resource (5) that you want to scan with this project, share or DFS namespace. Then display the server and the path (6). If the path and server can be resolved (7), no firewall is blocking us and the Resource Scan Service Account has sufficient rights to read the resource. Click on to Summary and Start (8).
The remaining tabs are irrelevant for the Group Policy project to be configured here.
Finally, select Read the share now (9).
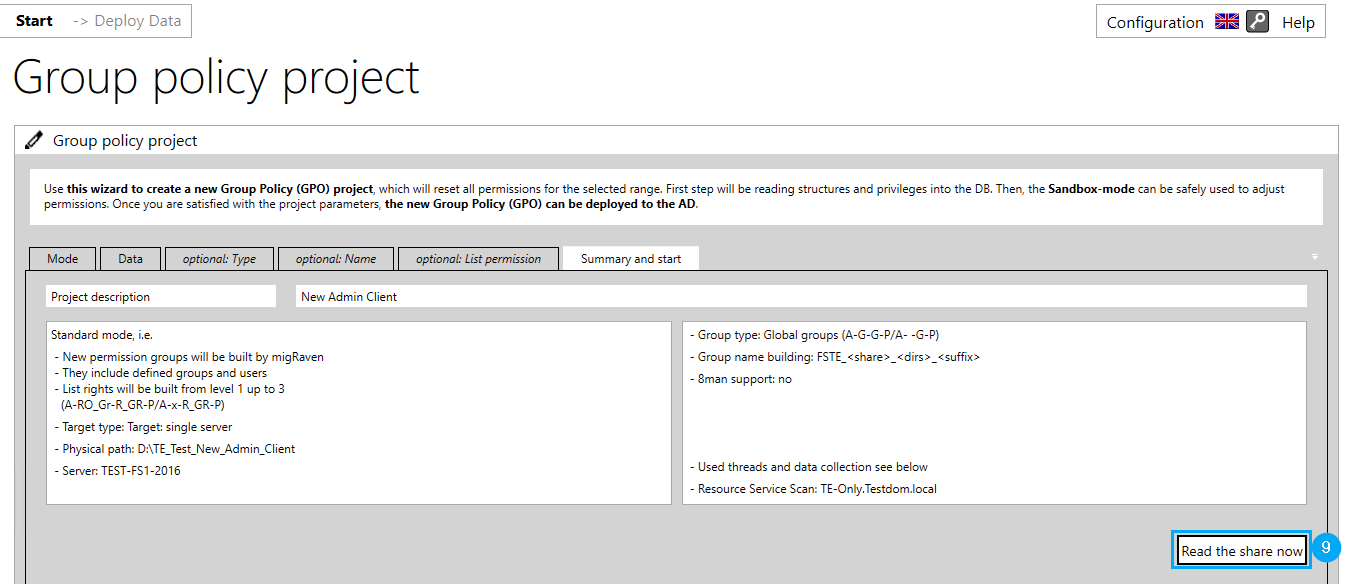
The project is then immediately scanned and the data is saved migRaven Database written (10).
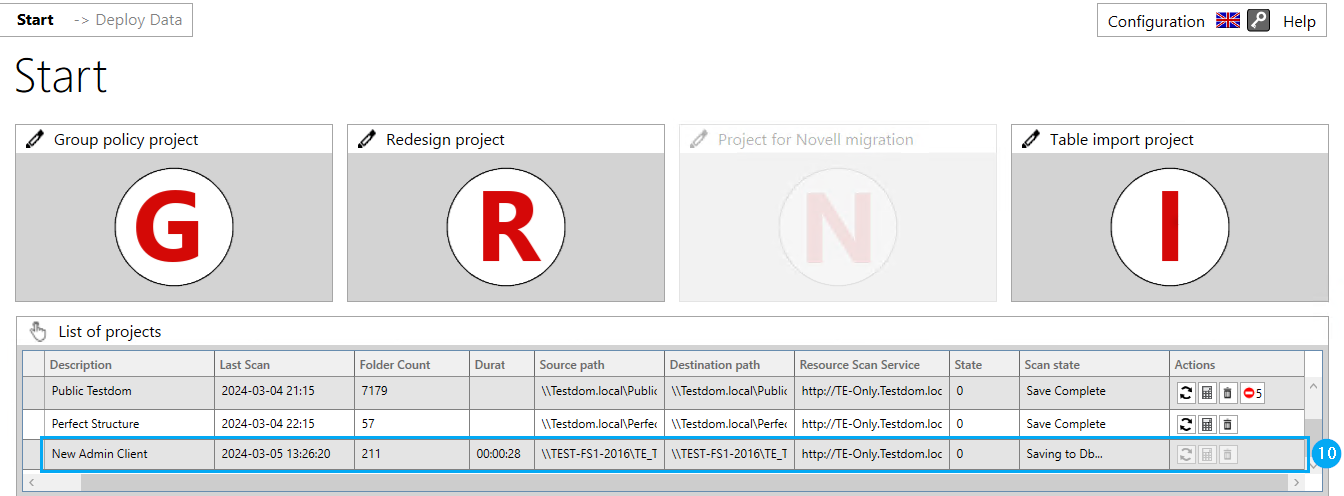
The scan is carried out with the user account Resource Scan Service carried out. Watch the “Folder Number” counter; it should continually increase. If it aborts or remains at -1, the rights of the user account that is in the Resource scan configuration stored on the resource to be scanned may not be sufficient.
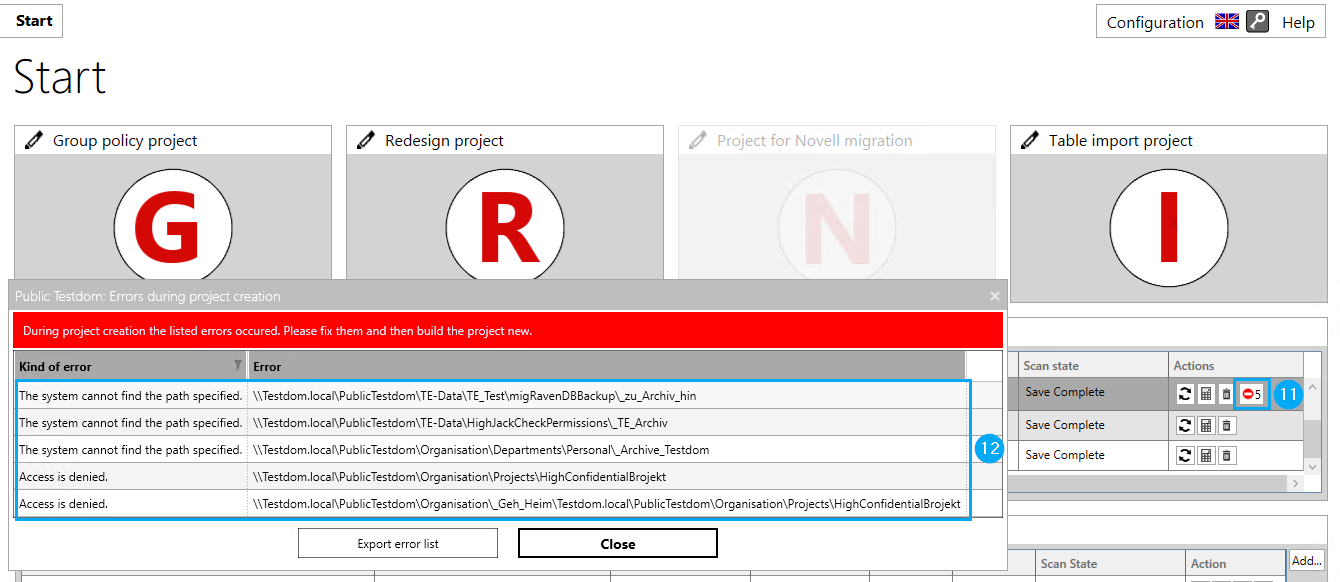
When the scan is completed, errors that have already been detected may occur (11). Click on the number of errors to get error details (12). On the one hand, it can happen that paths cannot be found, and on the other hand, the Resource Scan Service user does not have permissions to directories because, for example, inheritance is broken there. A first approach to correct structural errors.
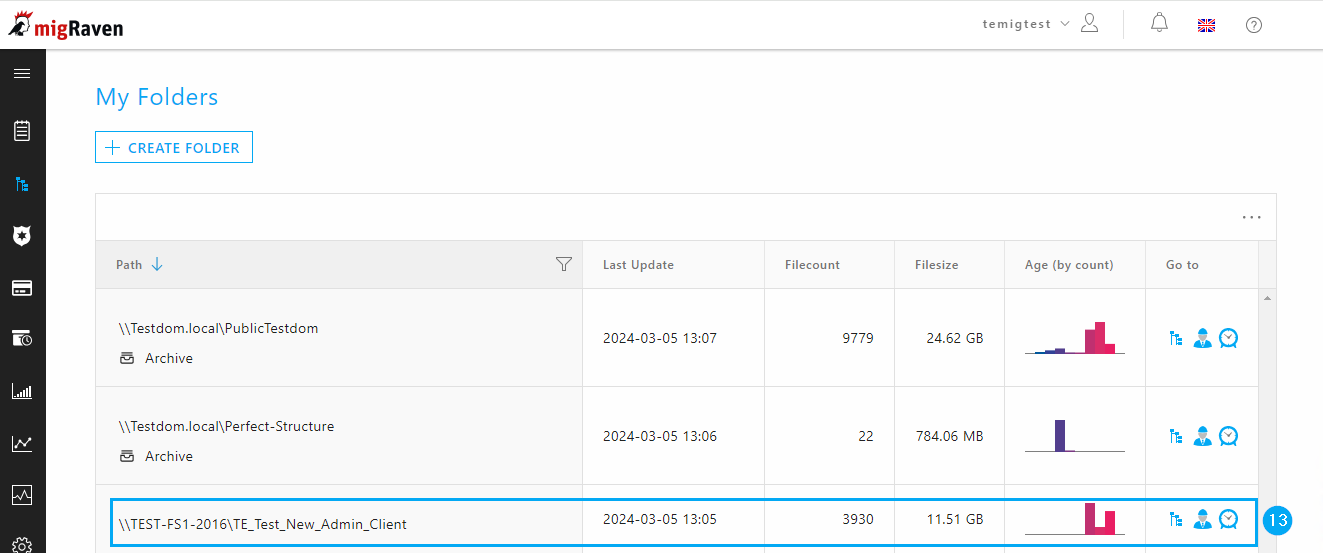
After the scan has been completely saved, the project is available to you as migRaven Administrator for initial analysis or to set a data owner migRaven Web Client available (13).
