With this article we will show you how to install and configure the migRaven.24/7 desktop clients.
A first overview of the functions of the desktop clients can be found in our article Desktop Client Exglimpse.
Note: For the desktop client to function, the TCP port 10291 be open on your firewall, both inbound and outbound.
Installation
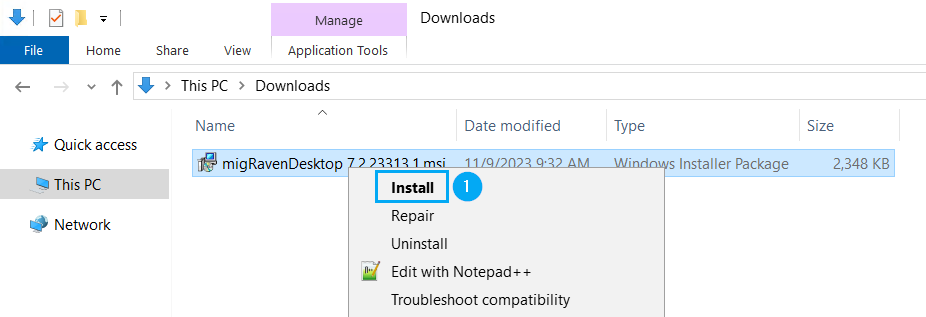
Run the migRavenDesktop(version).msi to begin the installation (1).

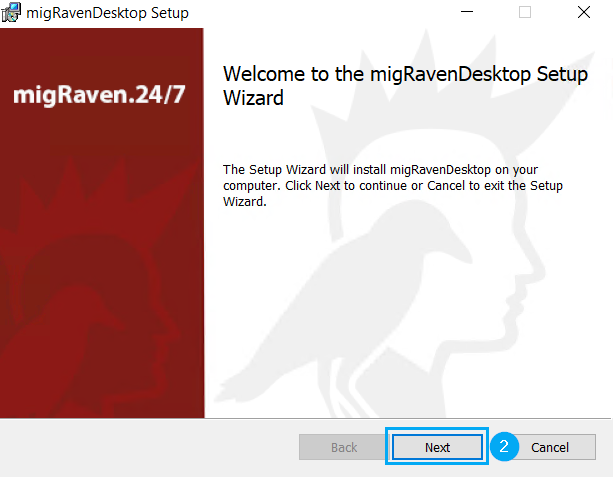
Drive up with one click Next (2) continue with the setup.

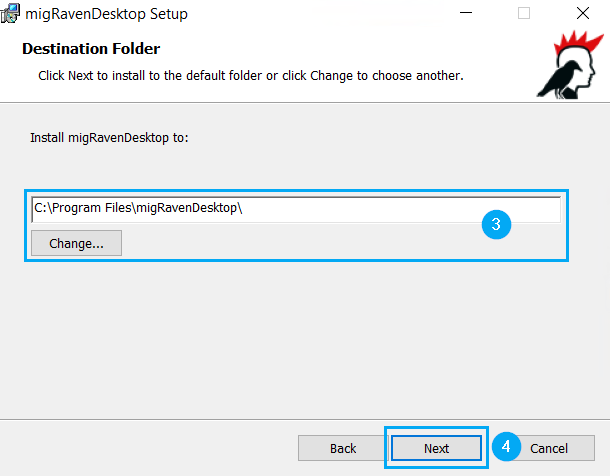
Specify the path under which you want to install the Desktop Client (3), we recommend installing under the standard path, and continue with the installation (4).

Identify yours DB Service Host Account, most secure about your services (5).

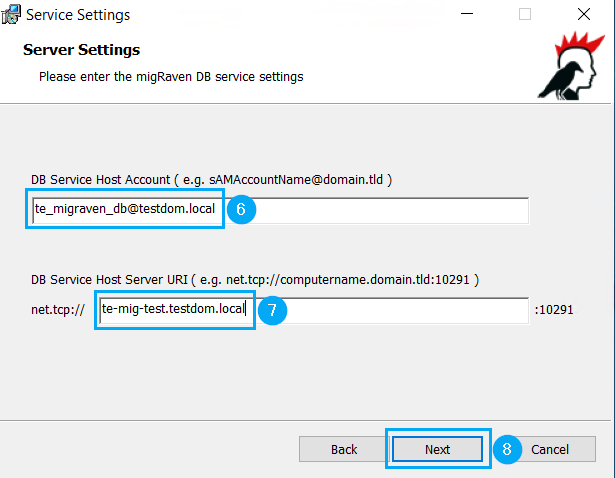
Wear that User Principal Name, UPN, des DB Service Host Accounts in the first line (6).
Enter your fully qualified server name in the second line migRaven Servers a (7).
Then continue with the installation (8).

If necessary, confirm the UAC. The desktop client is then installed, Windows Explorer opens and you can find the destination in the navigation on the left My folders.
Installation using central software distribution
There is also the option of central software distribution via GPO and msiexec console. The msiexec console command for a remote install is:
msiexec.exe /i"migRavenDesktop0.5.4.msi"ACCOUNT="NamedesAccounts@domain"URI="net.tcp://FQDN_des_migRaven_Servers:10291″

